How to Identify Unnecessary Programs on PC

WINDOWS PERFORMANCE GUIDE

PC me Unnecessary Software Kaise Identify Karein?

Safe Tarike Se Uninstall Karne Ka Complete Guide. Learn how to pinpoint resource-hogging bloatware and safely remove background processes without risking system stability.
QUICK ASSESSMENT GUIDE

Quick Answer: How Do You Know If a Program Is Unnecessary?

Before removing any software, evaluate it against these 8 critical metrics to prevent system instability or loss of vital functionality. If a program fails to satisfy these criteria, it is safe to uninstall.

8 KEY EVALUATION CRITERIA

What Is Unnecessary Software?

Not all programs on your system deserve to be there. Understanding the distinct categories of digital clutter is key to unlocking peak hardware efficiency.

1. Unused Applications (Bloatware & Forgotten Apps)

These are fully functional programs sitting completely idle on your storage drive. They are either pre-installed by the manufacturer (OEM bloatware) or downloaded by you for a single-use task years ago and forgotten.

2. Redundant Background Processes

These services run silently behind the scenes without an active user interface. While some are essential to keep your OS secure, others are unnecessary background threads spawned by closed applications that continuously consume RAM and CPU cycles.

3. High-Impact Startup Programs

These apps are configured to launch automatically the exact millisecond your operating system boots up. A high volume of startup programs severely bottlenecks your system’s startup speed and fragments your memory before you even open a browser.

4. Malware & Potentially Unwanted Programs (PUPs)

Intrusive software that sneaks onto your machine bundled with free software or downloads. Unlike simple inactive programs, malware and PUPs actively consume immense processing power, track browser history, and display unwanted advertisements.
A step-by-step navigation guide to viewing, analyzing, and auditing your system’s software library.

1. Quick Navigation Steps

2. Understanding App Details

Name (The App Title)
The official identifier of the application. You can use the built-in search bar at the top of the Windows list to look for programs using matching keywords.
Specifies the software developer (e.g., Microsoft Corporation, Adobe, or Epic Games). This details the origin of the software, helping you verify trusted installations.
The timestamp showing exactly when the app was initially installed or last updated on your hardware. Sorting by date lets you easily track down recently added apps.
Indicates the storage capacity (usually listed in megabytes or gigabytes) that the app occupies on your primary drive. Ideal for auditing space-heavy software.
Windows Settings Preview
LIVE INTERFACE
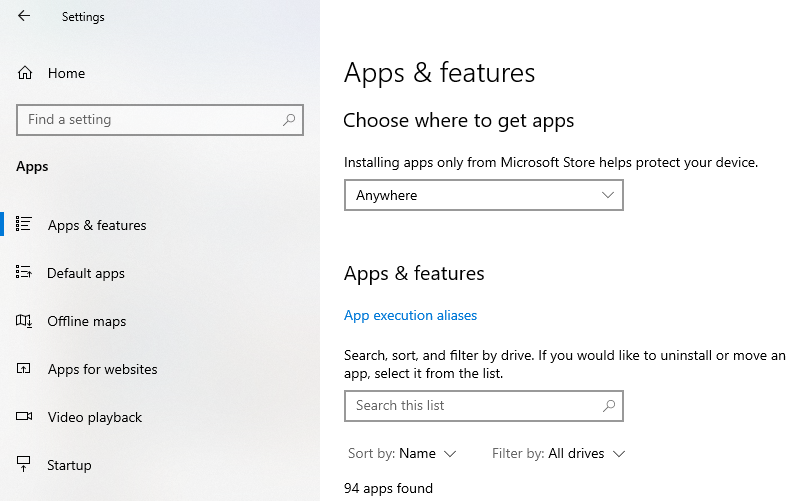
Settings -> Apps -> Installed apps. In this window, you can view the Name, Publisher, Size, and Date Installed for each application on your computer.

Programs You Should Be Careful About Removing

Uninstalling core hardware managers or essential system runtimes can lead to severe hardware malfunctions, broken connectivity, or a complete failure of the Windows OS to boot. Keep these critical components intact unless you are performing an advanced driver reinstall.

Chipset Drivers

Manages communication between the CPU, motherboard, and USB controllers.

Graphics Software

NVIDIA, AMD, or Intel control panels. Removal resets your display to basic resolution.

Audio Controllers

Realtek / MaxxAudio. Disabling can kill speaker outputs and jack sensing.

Wi-Fi Drivers

Intel / Killer Wireless drivers. Removing instantly severs your internet access.

Bluetooth Stack

Powers wireless peripherals, audio headsets, and game controllers.

Touchpad Utility

Synaptics / ELAN software. Disables multitouch gestures and trackpad precision.

Security Suites

TPM utilities and biometric login systems that secure credentials and keys.

OS Components

Microsoft Visual C++ runtimes and .NET Framework packages required by games and apps.

Safe Uninstallation Process

Follow our rigorous 9-step automated routine to guarantee zero residual registry clutter, total disk space recovery, and secure startup processes.

01

Close Active Processes

Shut down the target application fully and terminate any running task instances or background helper agents.

02

Initialize Secure Uninstaller

Launch our specialized removal module with local administrator rights for administrative structural privileges.

03

Run Registry & File Database Scan

Analyze core system logs, user app folders, and virtual mounts to map all trace directory pathways.

04

Wipe Executable Binaries

Safely delete all principal executable files, software kernels, dynamic libraries, and system drivers.
05

Purge Registry Keys

Deep-clean registry entries, invalid shortcuts, configuration files, and software interface registrations.
06

Clear Temporary Caches

Erase application directories nested in ProgramData, AppData/Local, and AppData/Roaming system pathways.
07

Erase Leftover Shortcuts

Remove obsolete icons, broken symlinks, shortcuts, start-menu entries, and desktop associations.

08

Check Startup Entries

Verify background startup actions to block automated boot files from restarting with Windows.
09

Verify Integrity & Reboot

Conduct a dynamic final audit process to secure database clean-state status, then restart the operating system.

SYSTEM PREPARATION GUIDE

Before You Uninstall Any Program

Prevent system instability, accidental data loss, and broken dependencies. Audit your system against this 8-point checklist before running any setup file or uninstaller.

1. Publisher Knowledge Verification

Verify developer signing details. Ensure the software isn’t an essential framework signed by Microsoft, Intel, or your hardware OEM.

2. Map Active Shared Dependencies

Check if other utilities depend on its core framework, libraries, runtime environments, or system drivers to function.

3. Backup Crucial User Data

Export critical configuration settings, local document directories, custom user profiles, and active databases safely.

4. Terminate Background Services

Ensure no automated background services, tasks, scheduled backups, or cloud synchronizers are running the program.

5. Identify Peripheral Drivers

Verify the tool is not running driver-level optimizations, peripheral controls, RGB integrations, or active cooling configs.

6. Secure Product & Activation Keys

Retrieve and backup critical serial keys, activation licenses, config tokens, or user credentials before wiping files.

7. Install Alternative Software First

Pre-configure alternative replacement software first, avoiding workflow interruption when the source tool is wiped.

8. Prepare Rollback & Original Media

Keep the installer’s original executable file or dynamic download path handy in case you need to urgently roll back.
FAQ & TROUBLESHOOTING

Frequently Asked Questions

Have questions about system cleanup? Read our expert answers on how to scan, identify, and cleanly remove stubborn background processes and residual file clutter.
How do I identify hidden or unwanted software running on my system?

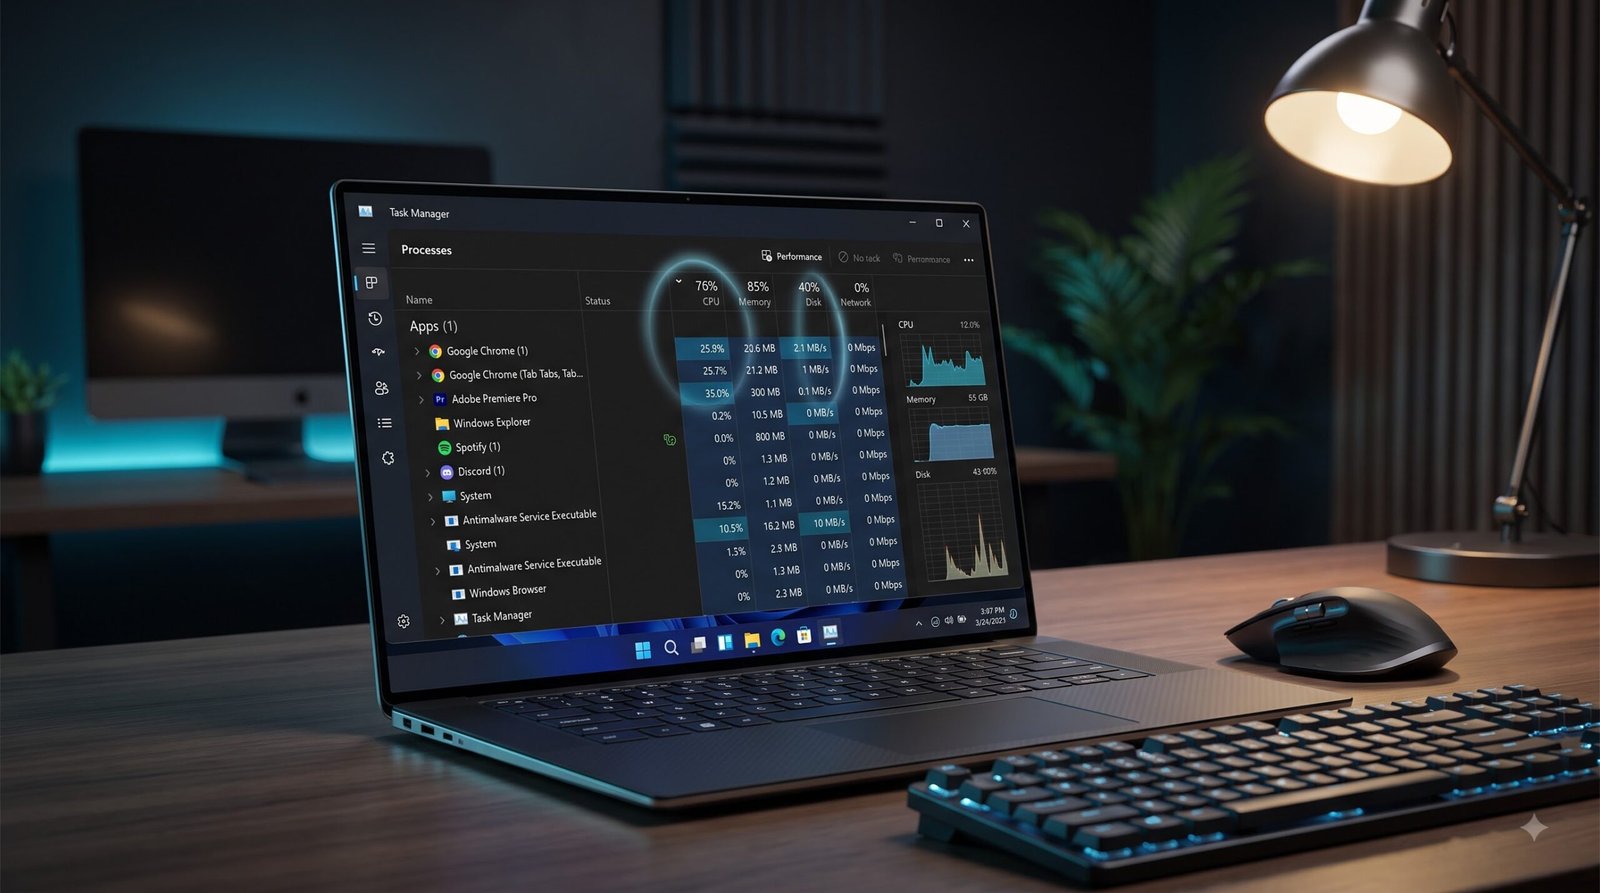
You can detect background applications using system utilities like Windows Task Manager (Ctrl + Shift + Esc) or macOS Activity Monitor. Look for unfamiliar processes that consume high CPU or memory. For a deeper, certified scan, use advanced administrative tools like Microsoft Sysinternals Process Explorer, which highlights verified publishers and checks running files directly against virus databases.
The safest method is always utilizing your system’s native panel (Apps & Features in Windows Settings or dragging files to Trash on macOS). For advanced cleanups, dedicated third-party uninstallers like Revo Uninstaller or AppCleaner scan your storage drive and Windows Registry immediately after the main uninstall to target and securely purge orphan temporary files, user logs, and cached libraries.
No, you should never manually delete installation folders directly from Program Files or Application folders. Deleting files manually leaves deep registry pathways, background auto-start scripts, system services, and dynamic link library (DLL) configurations fully active. This creates broken pointers, system slows down, and potential software installation blockages in the future.
When programs refuse standard uninstallation, boot your device into Safe Mode. This disables non-essential background processes and stops the software from actively blocking its own removal. You can then run the official uninstaller safely, or leverage Microsoft’s free Program Install and Uninstall Troubleshooter utility to force remove corrupted setup nodes.
Bloatware and trialware are pre-installed items shipped by your system’s hardware manufacturer. In 95% of cases, it is completely safe to uninstall them, and doing so dramatically improves startup times and disk space. Ensure you do not remove essential brand utilities responsible for your laptop’s cooling control, trackpad gestures, or audio processors.
On Windows, open Task Manager (Ctrl+Shift+Esc) and click the ‘Startup Apps’ tab to disable apps from loading. On macOS, access System Settings > General > Login Items and remove any unnecessary apps listed under ‘Open at Login’. Disabling secondary programs prevents hardware strain upon bootup without affecting their manual functionality.
Check the software executable properties to see if it contains a verified Digital Signature from a trusted manufacturer. Additionally, utilize a public scanning engine like VirusTotal to analyze the file hash across 70+ antivirus databases. If the signature is missing or flagged by multiple security products, quarantine and delete the file immediately.
Registry leftovers are remnants of software settings kept in the OS system configuration. While small fragments rarely slow down modern SSD-based setups, an accumulation of thousands of broken paths over years can cause incorrect file associations, software collision, and system index errors. A careful registry cleaning can resolve these specific issues safely.

Laptop Slow Ho Gaya Hai? Windows Laptop Ko Fast Karne Ke 15 Practical Ways

WINDOWS TROUBLESHOOTING

Laptop Slow Ho Gaya Hai? Windows Laptop Ko Fast Karne Ke Practical Ways

Agar aapka laptop hang ho raha hai ya slow chal raha hai, toh ye practical troubleshooting guide aapke liye hai. Bina kisi fake claims ke, jaaniye real hardware aur software fixes.

Quick Answer Summary

1. Task Manager: Pata Karein Laptop Slow Kyun Hai

Agar aapka laptop achanak slow ho gaya hai, to sabse pehle Ctrl + Shift + Esc daba kar Task Manager open karein. Yahan aap real-time dekh sakte hain kaunsa program aapke CPU, Memory (RAM), aur Disk ko sabse zyada use kar raha hai. Aksar background apps chupke se resources consume karte hain jinhe band karna zaroori hota hai.
⚠️ Warning: Kisi bhi unknown ya system process (jaise ‘System’ ya ‘Explorer.exe’) ko ‘End Task’ na karein, isse aapka Windows crash ho sakta hai.

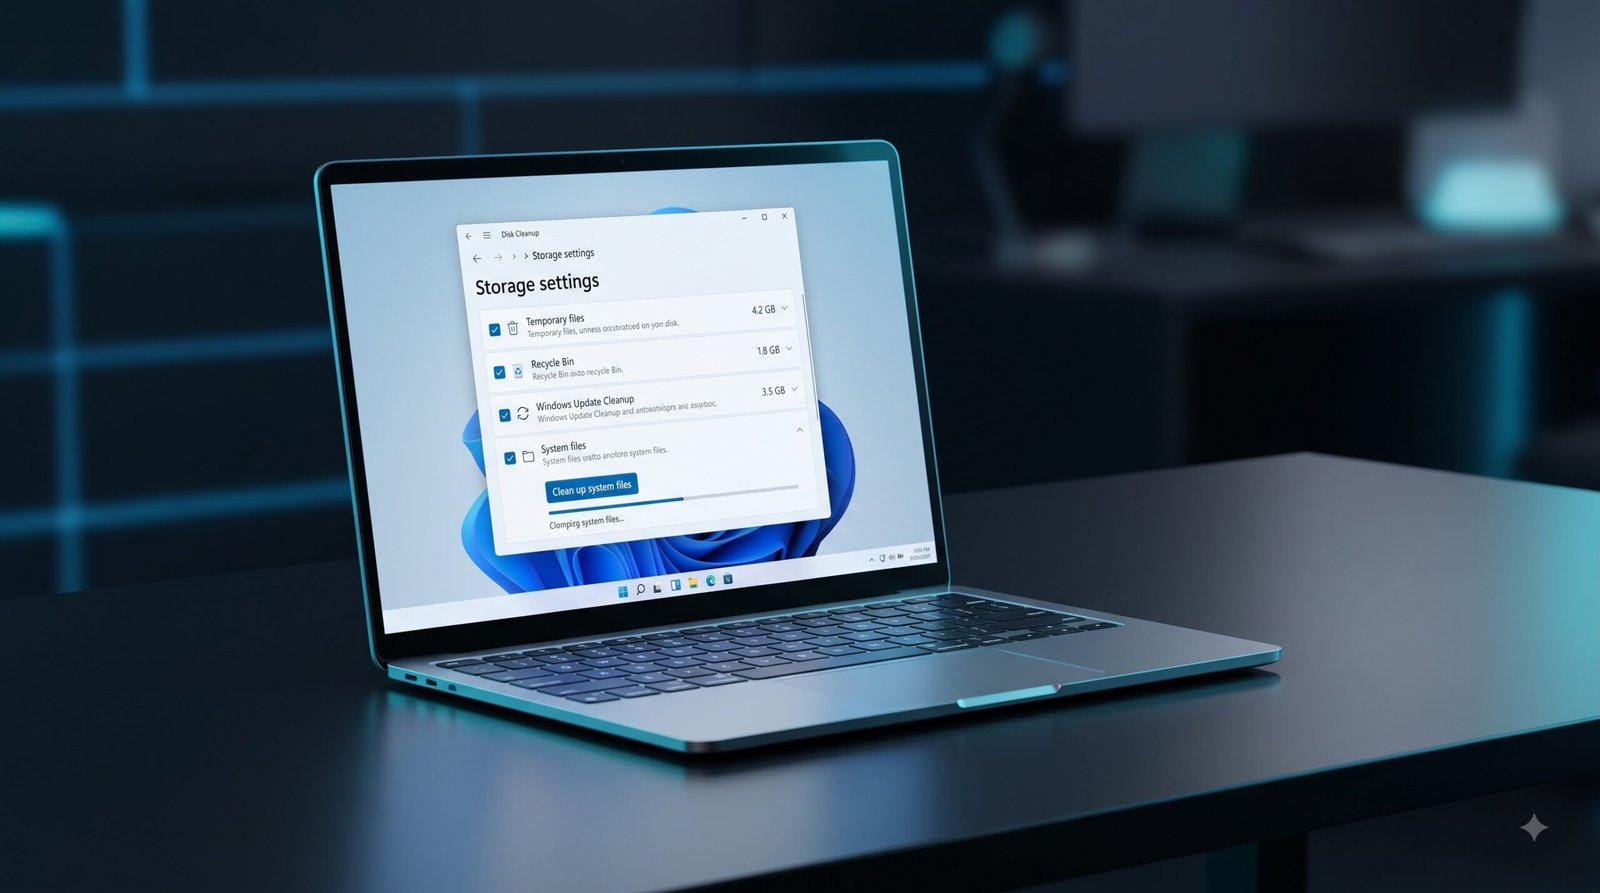
2. Disk Cleanup aur Temporary Files

Aapke system me temporary files aur cache jama hone se drive full ho jati hai, jisse OS overall slow perform karne lagta hai. Windows ke built-in clean up tools ka use karke is garbage file dump ko aasani se clean kiya ja sakta hai.

⚠️ It's Maintenance, Not a Magic Boost

Dhyan rakhein, disk cleanup karne se storage space recover hogi aur drive bottlenecks dur honge, lekin isse gaming me koi magical FPS boost nahi milega. Ye aapke storage hardware ki health aur normal speed ko maintain rakhne ka tarika hai.

3. Startup Apps, MSCONFIG aur Windows Update

Windows boot times aur system performance ko streamline karne ke liye teen zaroori kadam aur myths se bachne ka tarika.

Task Manager Startup Apps

Windows boot hote hi bohot saare apps background me auto-start ho jaate hain. Yeh apps bina wajah RAM aur CPU resources waste karte hain.

MSCONFIG Processors Myth

MSCONFIG me ‘Number of Processors’ setting active karne se speed nahi badhti. Yeh developer debugging ke liye hai taaki cores ko limit kiya ja sake.

Updates & Official Drivers

Third-party driver utility apps ke fasaad se door rahein. Yeh system files corrupt karte hain aur adware/spyware install kar sakte hain.

4. System File Check (SFC) aur DISM

Agar aapke Windows PC me unexplained crashes, slow dynamic performance, ya system system startup errors aa rahe hain, toh system files corrupt ho sakti hain. Windows ke paas inko automatic scan aur repair karne ke liye do zبردست internal utilities hain: SFC aur DISM.

SFC (System File Check): Ye local cache directory se corrupted system files ko scan karke direct replace kar deta hai. Command Prompt ko Administrator permissions ke sath open karein aur ye run karein:

sfc /scannow

DISM (Deployment Image Servicing): Agar local sfc cache hi corrupt ho chuki ho, toh DISM background me safe Windows Cloud Servers se healthy copies stream karke system files clean up karta hai:
DISM /Online /Cleanup-Image /RestoreHealth
💡 Expert Trick: Best results ke liye hamesha pehle DISM command chalayein, aur uske turant baad SFC scan karein takki offline image source aur live core files dono standard check pass kar sakein.
Run terminal scripts only as system administrator (Elevated CMD)

5. HDD vs SSD: Sabse Bada Performance Factor

Windows OS performance upgrade ke liye storage architecture ko samajhna zaroori hai. HDD aur SSD ke mechanics mein zameen-aasman ka farq hai.

Mechanical HDD

Purani technology jo spinning physical magnetic platters aur dynamic mechanical heads par depend karti hai.

Solid State Drive (SSD)

No moving parts. Direct, instant electrical pathway through high-speed flash chips.

⚠️ Critical Maintenance Rule: Do Not Treat SSDs Like HDDs!

SSDs ko kabhi bhi Defrag (Defragment) mat karein. SSD chips par limited write cycles hote hain, aur defragmentation bina kisi fayde ke thousands of extra writes create karke aapki drive ki life short kar deti hai. Windows built-in ‘Optimize’ tool automatically TRIM signal bhejta hai jo SSD ke liye completely safe aur standard process hai.

6. Storage Health aur CHKDSK

Hard Disk Sentinel portable utility ke jariye storage health regularly verify karein. Agar drive click-of-death, repetitive freezing, ya extreme slowdown show karti hai, toh system critical hardware crash stage par ho sakta hai.

Advanced CHKDSK Command Switches

⚠️ CRITICAL WARNING: BACKUP DATA FIRST!

Heavy scan commands runs multiple intense read operations. Agar drive hard hardware damage state par hai, toh CHKDSK run karne se drive complete failure mein switch ho sakti hai. Hamesha data backup priority rakhein.

7. RAM, Overheating aur Browser Optimization

Apne computer ya laptop ki processing speed ko boost karne aur lag/heat khatam karne ke teen sabse asardaar tareeqe.

RAM Usage Check

Task Manager (Ctrl + Shift + Esc) khol kar dekhein kaunse apps background me zyada memory consume kar rahe hain. Unused apps ko select karein aur ‘End Task’ par click karke RAM free karein.

Overheating & Dust

Tez fan ki awaaz aur heavy lagging overheating ki nishani hain. Laptop vents ko soft brush ya compressed air se clean karein. Bed ya soft surface ki jagah hamesha flat desk ya laptop stand ka use karein.

Browser Optimization

Zyada tabs open rakhne se browser heavy ho jata hai. Unused extensions ko turant remove karein, regularly cache data clean karein, aur speed badhane ke liye Hardware Acceleration feature ko active rakhein.
SYSTEM RESTORATION FRAMEWORK

Troubleshooting Checklist: Step-by-Step Order

Follow this logical sequence to systematically isolate physical failures, software conflicts, and deep OS corruption without skipping critical diagnostics.

01

Isolate the Symptom

Verify if the issue is strictly isolated to hardware, software, user account, or peripheral components.
02

Check Physical Connections

Verify raw power cables, re-seat memory modules (RAM), GPU cards, and storage cables securely.
03

Boot into Safe Mode

Verify if the OS successfully loads minimal native drivers to rule out third-party application conflicts.
04

Analyze BSOD Minidumps

Use tools like WinDbg or BlueScreenView to parse dump files and identify the exact driver causing memory crashes.

05

Inspect Event Viewer

Search Windows Logs > System / Application for critical errors or warnings occurred during system failure.
06

Verify Storage Integrity

Check SSD SMART values with CrystalDiskInfo, then execute ‘chkdsk /f /r’ to repair structural volume errors.
07

Test RAM with MemTest86

Run a bootable memory diagnostic test overnight to isolate silent, intermittent hardware RAM corruption.
08

Run SFC & DISM Commands

Reconstruct system files by executing ‘DISM.exe /Online /Cleanup-image /Restorehealth’ and ‘sfc /scannow’ in admin cmd.
09

Roll Back Recent Updates

Uninstall newly deployed cumulative updates or OEM hardware drivers that may have broken system compatibility.
10

Monitor Thermal Performance

Verify that critical CPU and GPU temperatures remain safe under heavy stress test loads using HWMonitor.
11

Update BIOS/Firmware

Flash stable motherboard UEFI/BIOS revisions and SSD controller firmware to resolve underlying board anomalies.
12

Perform a Clean Boot

Isolate persistent runtime errors by temporarily stripping unnecessary non-Microsoft services and startup apps.
13

Restore System State

Revert the OS to an automated configuration checkpoint using System Restore or clean disk image back-ups.
14

Clean OS Reinstallation

Perform a fresh installation of the OS using dedicated bootable media to eliminate persistent file-structure corruption.

Common Mistakes to Avoid

Frequently Asked Questions

Aapke saare tech aur hardware related doubts ka clear-cut Hinglish solution.
1. Kya SSD lagane se mera purana laptop sach mein fast ho jayega?
Ji haan! Ek purani HDD ke muqable SATA ya NVMe SSD aapke system boot-up time, file transfer aur multitasking speed ko 5x se 10x tak fast kar deti hai. Ye aapke purane laptop ko naya jaisa bana degi.
Windows update ke baad system background mein indexing aur optimization run karta hai jo temporary lag create karta hai. Iska best solution hai temporary junk files clear karna, startup programs disable karna aur disk cleanup tool run karna.
Laptop fans ko har 6-12 mahine mein dry-blow karke saaf karein. Thermal paste dry hone par processor heat transfers nahi kar pata, isliye har 1.5 se 2 saal mein high-quality thermal paste lagwana behad zaroori hai.
Normal routine, office work aur casual gaming ke liye standard SATA SSD kaafi hai. Lekin agar aap heavy tasking, 4K video editing ya large development software use karte hain, toh NVMe M.2 SSD bilkul sahi choice hai kyunki iski read/write speed amazing hoti hai.
Haan, aap kisi bhi purane laptop ya desktop ki internal 2.5-inch HDD ko ek saste ‘SATA External Casing’ (Enclosure) mein dalkar portable backup drive ki tarah aasani se use kar sakte hain.
Windows Reset ke waqt aapko do option milte hain: ‘Keep my files’ (jismein files save rehti hain bas programs delete hote hain) aur ‘Remove everything’ (jismein sab kuch saaf ho jata hai). Koi bhi reset karne se pehle apna backup zaroor bana lein.

Join Tech Dhamaka Hub!

Rozana technical video tutorials, hardware installation guides aur emergency quick fixes pane ke liye humein follow karein.

Quick Tech Recap

Is complete hardware guide ka quick summary yaad rakhein:

Was this guide helpful?

© 2026 Tech Dhamaka. All Rights Reserved.
Privacy Policy | Terms & Conditions | Contact Us